Setting Breakpoints on Classes and Functions
The Action Point > At Location dialog box lets you set breakpoints on all functions within a class or on a virtual function. The All Methods in Class and All Virtual Functions and Overrides check boxes tell TotalView that it should set multiple breakpoints. Each place that TotalView sets a breakpoint will have its own breakpoint icon. For example, if there are ten class functions, each will have its own unique breakpoint.
TotalView tells you that the action point is set on a virtual function or a class in the Action Points tab. If you dive on the action point in this tab, TotalView brings up its Ambiguous Function dialog box so that you can select which it should display. You may want to select the Show full path names check box if you can’t tell which you want from the function’s signature.
If a function name is overloaded, the debugger sets a breakpoint on each of these functions.
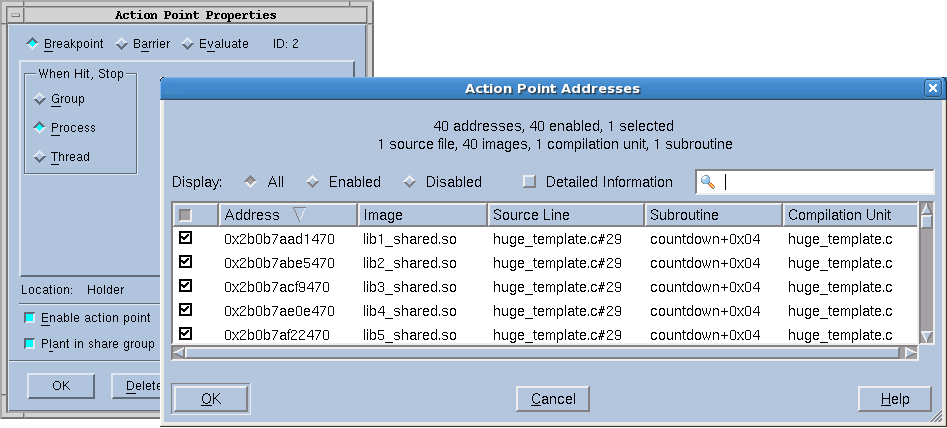
If you only want breakpoints on some functions, you will need to select the breakpoint and then get to the Properties Window. Do this either by right-clicking on the breakpoint and click Properties or by selecting the Action Point > Properties command, and then clicking Addresses.
You can now individually add or remove breakpoints.Initially, addresses are either enabled or disabled, but you can change their state by clicking the checkbox in the first column. The checkbox in the columns bar enables or disables all the addresses. This dialog supports selecting multiple separate items (Ctrl-Click) or a range of items (Shift-Click or click and drag). Once the desired subset is selected, right-click one of the selected items and choose Enable Selection or Disable Selection from the context menu.
Filtering
In massively parallel programs, the number of addresses can become very large, so the Addresses dialog has several mechanisms to help you manage the data. The search box filters the currently displayed data based on one or more space-separated strings or phrases (enclosed in quotes). Remember that data not currently displayed is not included in the filtering. It may be helpful to click the Detailed Information checkbox, which displays much more complete information, giving you more possibilities for filtering.
Sorting
Clicking on the column labels performs a sort based on the data in that column. Each click toggles between ascending and descending order. If entry values in a column are the same, the values of the column to the right of the sorted column are examined and sorted based on those values. If the values are the same, the next column is examined and so on, until different values are found. The Addresses dialog uses a stable sort, i.e. if all the entries are the same in the selected column and in the columns to the right, the list is not modified.
Displaying and rearranging columns
Finally, right-clicking in the columns bar presents a context menu for displaying or hiding columns. All are initially displayed except Image. You can reorder the columns by selecting a column label and dragging it to a new location.
Keyboard Shortcuts
To provide easy access to the buttons at the bottom of the Addresses dialog, the following mnemonic keys have been assigned.
Button | Keyboard Sequence |
OK | Alt-o |
Cancel | Alt-c |
Help | Alt-h |