Put a Custom Control on the Main Dialog Template
In this step, a user control is drawn on the dialog template as a placeholder for the grid window. The actual link to the grid object will be made at run time during the dialog's initialization.
1. Open the IDD_DLGGRID_DIALOG template in the resource editor.
2. Remove the "TODO:" static control (IDC_STATIC).
3. Select the custom control from the
Toolbox:

.
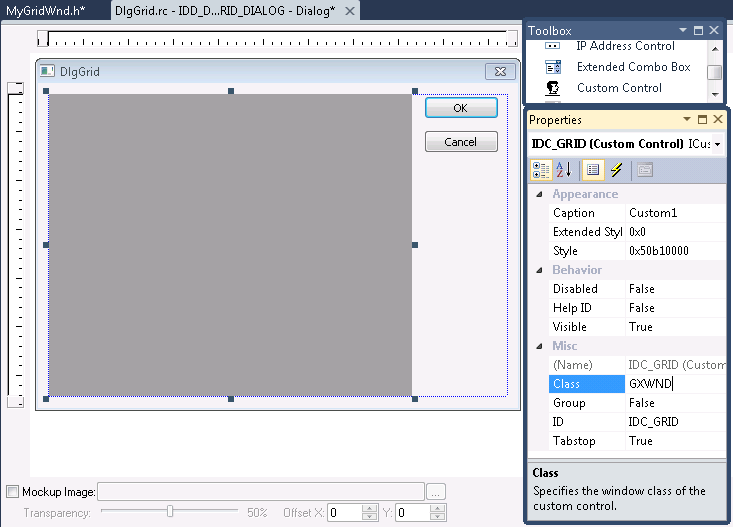
4. Draw a custom control on the dialog template.
5. Open the Custom Control Properties dialog box (press Alt-Enter or choose Properties… from the context menu).
6. Change the ID to IDC_GRID.
7. Specify GXWND in the Class: field. Please note that this specifies the WNDCLASS registered by Objective Grid during initialization and not the name of your C++ CGXGridWnd derived class. Do not specify the C++ class name of your grid here, you must specify GXWND and GXWND must be all caps.
8. Change the Style: field to 0x50b10000. This indicates that both scroll bars and a border should be drawn. To specify border only (no scroll bars) use 0x50810000.
9. Close the Custom Control Properties dialog.
10. Close the IDD_DLGGRID_DIALOG template.
11. Save DlgGrid.rc (press CTRL+S).