1stGrid - Step 2
Modify 1stGrid View's Menu Resource
This step adds new menu items for Redo, Find, and Properties.
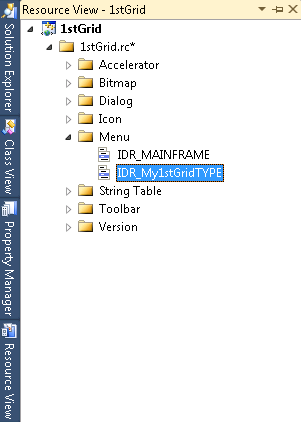
1. Open the 1stGrid project resources (1stGrid.rc).
(To open resources in Visual Studio, select the View|Resource View from the menu.)
2. Expand Menu in the resource tree and double click IDR_My1stGridTYPE.
3. The IDR_My1stGridTYPE menu resource appears in a resource edit view.
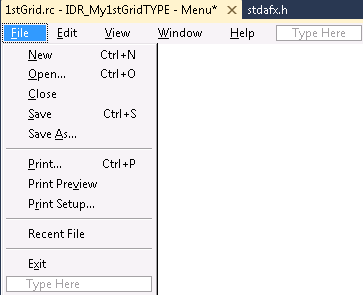
4. Click Edit in the menu resource.
5. Click the Separator after Undo.
6. Right click and select Insert New.
7. A blank menu item is inserted.
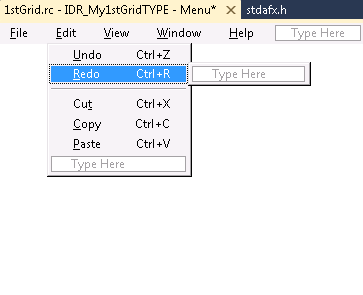
8. Right click on the newly inserted item and select Properties.
9. Type &Redo\tCtrl+R in the Caption field and ID_EDIT_REDO in the ID field.
10. Press Enter.
11. Click the last empty menu item under Edit in the menu resource edit view.
12. Right click and select Insert Seperator.
13. Select the last empty menu item under Edit in the menu resource edit view.
14. Right click the empty menu item and select Insert New.
15. Right click the newly inserted item and select Properties.
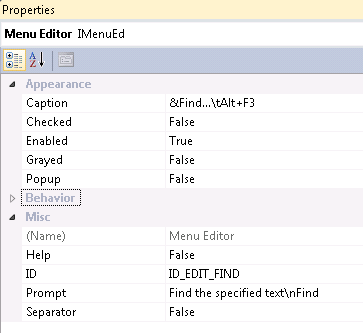
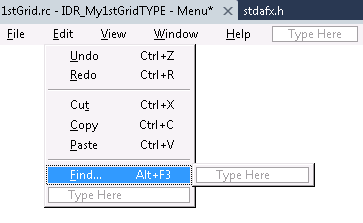
16. Type &Find...\tAlt+F3 in the Caption field. The ID for the menu item should be ID_EDIT_FIND.
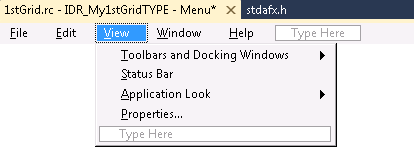
17. Click View in the menu resource.
18. Select the last empty menu item under View in the menu resource edit view.
19. Right click and select Insert New.
20. Type &Properties... in the Caption box.
21. Set the ID for this item to ID_VIEW_PROPERTIES, then type Change Display Properties\nProperties in the Prompt box.
22. Close and save the resource file.
Map the 1stGrid Menu Messages
This step demonstrates how to map the new menu items from the previous step to message handlers in the view class. Objective Grid already provides handlers for Edit|Undo, Edit|Redo and Edit|Find in the CGXGridView class. Only the View|Properties menu needs to be mapped in this step.
The code provided in this section is more advanced than code presented in other sections. This is to give you a feel for the object oriented nature of Objective Grid. It also demonstrates the ease with which Objective Grid can be customized.
To understand the code below it may help to understand that the properties object is an instance of CGXProperties. CGXProperties stores display and print properties for the grid object. The property object is contained in the parameter object. Recall from the Design Overview section that the parameter object is analogous in some ways to the MFC CDocument. The parameter object is the data storehouse for the grid object in much the same way as the CDocument derived classes are for MFC applications. Also recall that parameter objects can be stored in MFC documents.
1. Open the View|Class View menu.
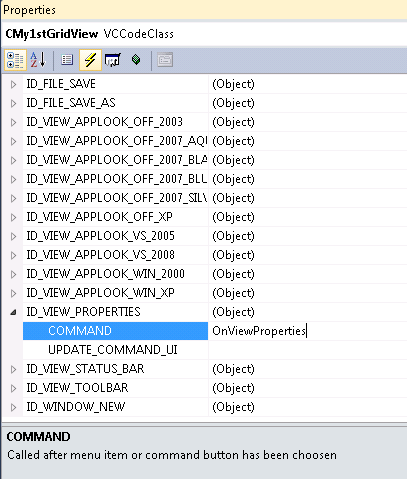
2. Right click CMy1stGridView and select Properties.
3. Select the Events icon.
4. Expand the ID_VIEW_PROPERTIES node.
5. Click on the COMMAND field and select <Add> OnViewProperties from the combo box.
The source file is opened in the editor and the OnViewProperties function is added.
6. Replace the following method in 1stgrvw.cpp:
void C1stGridView::OnViewProperties()
{
BOOL bSaveDefault = FALSE;
// Get the properties object from the parameter object
CGXProperties* pPropertyObj =
GetParam()->GetProperties();
ASSERT(pPropertyObj->IsKindOf(RUNTIME_CLASS(CGXProperties)));
CGXProperties* pNewSettings = new CGXProperties;
*pNewSettings = *pPropertyObj;
// This is a pre-built dialog that can modify a
// properties object based on user input. We simply
// create a copy of our existing parameter object and
// pass it on to this dialog.
CGXDisplayPropertiesDialog dlg(pNewSettings,
GetParam()->GetStylesMap(),
&bSaveDefault,
FALSE);
int result = dlg.DoModal();
if (result == IDOK)
{
// Allow the grid to use the changed properties object
ChangeProperties(*pNewSettings);
// Write new information to the profile if required.
if (bSaveDefault)
pPropertyObj->WriteProfile();
}
delete pNewSettings;
}
Map the 1stGrid Accelerator Keys
This step maps accelerator keys to the new menu items. Note the fact that this editing can be done in two ways: directly in the Accelerator editor window, or in the associated Properties dialog.
1. Open 1stgrid.rc (View|Resource View).
2. Open Accelerator and double-click IDR_MAINFRAME.
3. The Accelerator editor window appears.
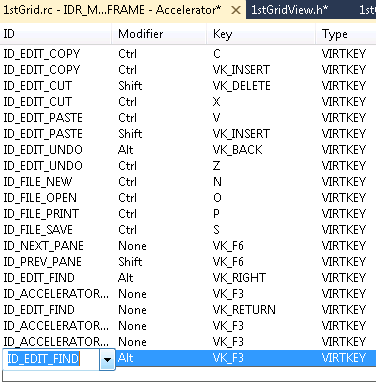
4. Double click the last empty line in the Accelerator table.
The Properties dialog box appears.
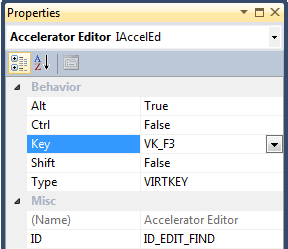
5. In the Accelerator table, select ID_EDIT_FIND in the combo box for the ID column.
6. Click in the Modifiers column, and select Alt from the combo box. This causes Alt to be set to True in the Properties dialog, and Shift and Ctrl to be set to False.
7. Click in the Key column and select VK_F3 from the combo box.
8. Press Enter.
9. Double-click on the last empty line of the Accelerator table.
The Properties dialog box appears again.
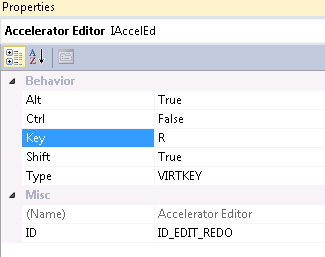
10. In the Accelerator table, select ID_EDIT_REDO in the ID combo box.
11. In the Behavior group of the Properties dialog, set Ctrl to False, and Shift and Alt to True.
12. Type R in the Key text field.
13. Press Enter.
14. Close and save the resource file.
More Formatting
This step initializes the grid view. You can find a complete listing of the code changes for this step in
1stGrid\Step2 sample available from the Rogue Wave Web site, as explained in
“Location of Sample Code” in the
Getting Started part. Also refer to the comments in the code below for an explanation of its purpose.
1. Open 1stGridView.cpp.
2. Add the following code to OnInitialUpdate() immediately before the line with GetParam()->EnableUndo(TRUE).
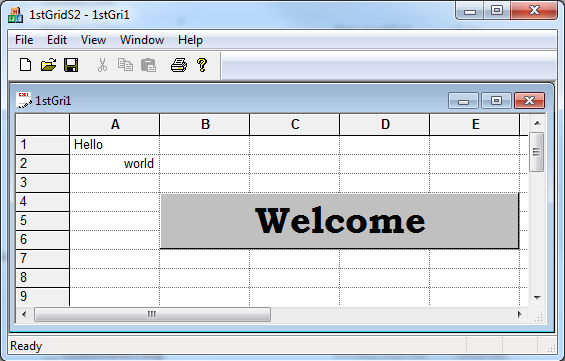
// Make a big headline from cell (4,2) to cell (6,5). You can use
// this call to cover several cells as one cell.
SetCoveredCellsRowCol(4, 2, 6, 5);
// Display "Welcome" in the covered
// cell with some formattings.
// Notice that some of the calls
// made on the style object take
// other objects (CGXFont etc.,)
SetStyleRange(CGXRange(4,2),
CGXStyle()
.SetValue("Welcome") // Text to be displayed
.SetControl(GX_IDS_CTRL_STATIC) // Static Text, no editing
.SetVerticalAlignment(DT_VCENTER) // Center vertical
.SetHorizontalAlignment(DT_CENTER) // Center horizontal
.SetFont(CGXFont() // Some decorative font
.SetFaceName(_T("Bookman Old Style"))
.SetSize(28)
.SetBold(TRUE)
)
.SetInterior(CGXBrush()
.SetColor(RGB(192,192,192)) // light gray
)
.SetDraw3dFrame(gxFrameRaised) // With raised effect.
.SetEnabled(FALSE) // User cannot click on it
);
// change the default font for all cells
// The call to
//
// CGXStyle()
// .SetValue("Welcome") // Text to be displayed
// .SetControl(GX_IDS_CTRL_STATIC)
//
// This is possible because each of these calls
// returns a reference to the object itself. For example
// SetValue(…) returns a reference to CGXStyle (CGXStyle&)
// and hence the next call to SetControl is possible and so on.
// The StandardStyle is the style for the entire grid (this will be
// used in the absence of any other styles (that are cell specific)
ChangeStandardStyle(CGXStyle()
.SetFont(CGXFont().SetSize(10)) // Bigger font
.SetAutoSize(TRUE) // Cells will grow automatically
// when user enters large text.
.SetWrapText(TRUE) // Wrap text when it does not
// fit into a single line.
.SetAllowEnter(TRUE) // When user presses <Enter>
// a new line will be inserted
// into the text of the cell.
, gxOverride );
Compile and Run 1stGrid - Step 2
At this point, you can compile and run the 1stGrid application.
1. Use the Edit|Find menu command to type in text, undo and redo your changes and search text.
2. Compile the application and run it.
NOTE >> You can copy menu items from gridapp.rc in <stingray-installdir>\Samples\Grid\General\GridApp to your application. Open gridapp.rc and take a look at the IDR_GRIDAPTYPE menu resource and copy the menu items you would like to support in your own application. The file mygridvw.cpp in \samples\grid\general\gridapp contains code that you may want to include in your view class for menu handlers.