Step Two: Plotting Scribble Data with an X-Y Scatter Chart
NOTE >> Estimated time to complete Step 2: 45 minutes
Introduction
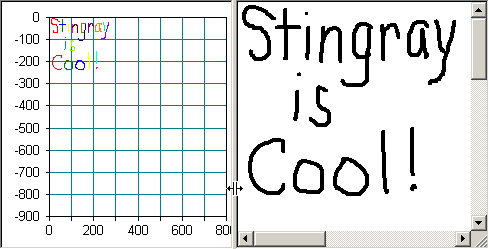
In this step of the tutorial, you will integrate a chart window with the existing Scribble window. The chart will be displayed alongside the Scribble data. An X-Y scatter chart is appropriate for this application. This chart will plot the x-y coordinates held in the CPoint objects that make up the strokes. The resultant display will clearly show the correlation between Scribble data and Objective Chart data.
Scribble already has a splitter window that can be used to display two panes. Scribble will edit x-y coordinate information in one pane, and Objective Chart will display this information in an X-Y scatter chart in the second pane.
The splitter creation process must be modified to include two types of views rather than multiple copies of the same view.
NOTE >> You do not need to do Step 1 before attempting Step 2.
Create the Chart View
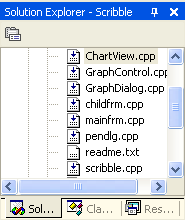
1. Open the Scribble solution scribble<ver>.sln from the step1 folder, where <ver> is the Micorsoft Visual Studio version.
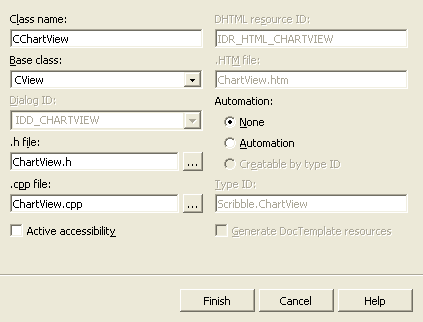
2. On the
Insert menu, click
New Class to create a new view. Create a new class named
CChartView (based on
CView) as shown in
Figure 53.
Modify the CView's Base Class
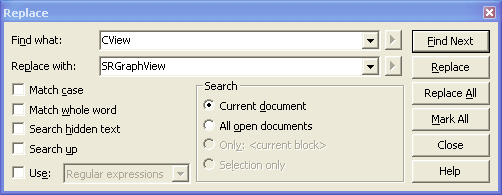
1. Open ChartView.cpp.
2. On the Edit menu, click Replace to search for CView. Replace all occurrences of CView with SRGraphView.
3. Open ChartView.h and perform another search, again replacing CView with SRGraphView.
This will change the base class of our view from CView to SRGraphView. This method ensures that the class remains in ClassWizard's records and allows ClassWizard to add standard message handlers.
Display the Graph in the View
The new view class needs to know about the document so it can display the graph contained in it.
1. Edit ChartView.h to include scribdoc.h.
#include "scribdoc.h"
2. Add the following lines to the public operations section.
virtual SRGraph * GetGraph();
CScribbleDoc * GetDocument();
3. Define GetDocument() and GetGraph() by putting the following lines of code under the Include Statements section of ChartView.cpp:
CScribbleDoc * CChartView::GetDocument()
{
return (CScribbleDoc *)m_pDocument;
}
SRGraph * CChartView::GetGraph()
{
return &GetDocument()->m_Graph;
}
4. In the CChartView drawing section, modify OnDraw() by replacing the existing code with GetGraph()->DrawComponentList(pDC,this); as follows:
void CChartView::OnDraw(CDC* pDC)
{
GetGraph()->DrawComponentList(pDC,this);
}
Add the Chart View to the Splitter Pane
1. Modify the childfrm.cpp file to include the ChartView.h file and the scribvw.h file:
#include "ChartView.h"
#include "scribvw.h"
2. Modify the CSplitterWnd code in the original Scribble source to create our dual view window. The modified text of the OnCreateClient() function in CChildFrame is shown below:
BOOL CChildFrame::OnCreateClient(LPCREATESTRUCT /* lpcs */, CCreateContext* pContext)
{
SIZE s;
s.cx = 10;
s.cy = 10;
// note how the CreateStatic() function is used instead of
// the dynamic "create" function
BOOL b = m_wndSplitter.CreateStatic(this, 1, 2);
if(b)
{ // splitter window creation is happy. Carry on with the
// assignment of the CViews to the panes.
// The left pane will be our chart window.
s.cx = 0;
m_wndSplitter.CreateView(0,0, // first pane
RUNTIME_CLASS(CChartView), // the class we want to use
s, // this one has no size
pContext);
// The right pane will be our original scribble window.
s.cx = 300;
m_wndSplitter.CreateView(0,1, // second pane
// the class we want to use
RUNTIME_CLASS(CScribbleView),
s, // this one is seen
pContext);
}
return b;
}
Add an SRGraph Object to the Document
To place an SRGraph object in the document (to store the graph and its data), insert a single line (SRGraph m_Graph;) into scribdoc.h as shown below:
class CScribbleDoc : public CDocument
{
protected: // create from serialization only
CScribbleDoc();
CHART_DECLARE_DYNCREATE(CScribbleDoc)
// Attributes
protected:
// The document keeps track of the current pen width on
// behalf of all views. We'd like the user interface of
// Scribble to be such that if the user chooses the Draw
// Thick Line command, it will apply to all views, not just
// the view that currently has the focus.
UINT m_nPenWidth; // current user-selected pen width
BOOL m_bThickPen; // TRUE if current pen is thick
UINT m_nThinWidth;
UINT m_nThickWidth;
CPen m_penCur; // pen created according to
// user-selected pen style (width)
public:
SRGraph m_Graph;
CTypedPtrList<CObList,CStroke*> m_strokeList;
CPen* GetCurrentPen() { return &m_penCur; }
.
.
.
Modify the Serialization Function
NOTE >> The chart data must be saved along with the Scribble data.
In scribdoc.cpp, add a serialization call for the recently added SRGraph object in the CScribbleDoc::Serialize() function.
void CScribbleDoc::Serialize(CArchive& ar)
{
if (ar.IsStoring())
{
ar << m_sizeDoc;
}
else
{
ar >> m_sizeDoc;
}
m_strokeList.Serialize(ar);
m_Graph.Serialize(ar);
}
Initialize the Document
Whenever a Scribble document is created, the InitDocument() function is called. This function can be used to initialize our chart. However, the original version of Scribble calls the InitDocument() function from the OpenDocument() call. This means that multiple copies of the scatter graph could be created unless you prevent it.
The routine below checks the chart display and skips initialization if the component list is not empty.
NOTE >> Note that InitDocument() is not a part of the standard MFC document function set and was added manually to the original Scribble.
Add the routine below (the bold text) to the InitDocument() function.
void CScribbleDoc::InitDocument()
{
m_bThickPen = FALSE;
m_nThinWidth = 2; // default thin pen is 2 pixels wide
m_nThickWidth = 5; // default thick pen is 5 pixels wide
ReplacePen(); // initialize pen according to current width
// default document size is 800 x 900 screen pixels
m_sizeDoc = CSize(800,900);
if(m_Graph.GetComponentList()->IsEmpty()) //SRGraph
{
// Initialize the chart display.
SRGraphDisplay *pD=new SRGraphDisplay;
pD->GetStyle()->SetGraphStyle(CX_GRAPH_XYSCATTERG);
pD->GetStyle()->SetAxisStyle(CX_AXIS_XYSCATTER);
m_Graph.AddComponent(pD);
//We know that the chart scale will be fixed
//so we'll program that page size into the chart too.
pD->GetStyle()->SetUseMaxScale(TRUE);
pD->SetMinRangeX(0);
pD->SetMaxRangeX(800);
pD->SetMaxRangeY(0);
pD->SetMinRangeY(-900);
}
m_Graph.SetFeedbackLogging(FALSE);
m_Graph.SetBackgroundDraw(FALSE);
}
Add Fresh Data to the Chart
As data is entered into the Scribble document, it needs to be duplicated into the chart. Scribble's stroke gathering routines must be modified. This is not the most efficient method, but our aim is to relate chart operations to ones already familiar to MFC programmers.
In scribdoc.cpp, modify the NewStroke() function to create two new data groups, one for the X coordinates and one for the Y coordinates.
CStroke* CScribbleDoc::NewStroke()
{
// This will automatically create a new group
// for the X coordinates
m_Graph.GetGroup(m_Graph.GetGroupCount());
// This will automatically create a new group
// for the Y coordinates
m_Graph.GetGroup(m_Graph.GetGroupCount());
CStroke* pStrokeItem = new CStroke(m_nPenWidth);
m_strokeList.AddTail(pStrokeItem);
// Mark the document as having been modified, for
// purposes of confirming File Close.
SetModifiedFlag();
return pStrokeItem;
}
Modify the Button Handler
Modify the OnLButtonDown() handler in the view class (scribvw.cpp) to add indices to the groups just created.
void CScribbleView::OnLButtonDown(UINT, CPoint point)
{
// Pressing the mouse button in the view window starts a
// new stroke. CScrollView changes the viewport origin and
// mapping mode. It's necessary to convert the point from
// device coordinates to logical coordinates, such as are
// stored in the document.
CClientDC dc(this);
OnPrepareDC(&dc);
dc.DPtoLP(&point);
m_pStrokeCur = GetDocument()->NewStroke();
// Add first point to the new stroke
m_pStrokeCur->m_pointArray.Add(point);
// Data is added to the chart
SRGraph * pGraph = &GetDocument()->m_Graph;
int nGroups=pGraph->GetGroupCount();
SRGraphData *pData=pGraph->GetGroup(nGroups-2)
->GetIndex(0);
pData->SetValue((double)point.x);
pData->GetStyle()->SetObjectStyle(CX_OBJECT_LINE);
pData=pGraph->GetGroup(nGroups-1)->GetIndex(0);
pData->SetValue((double)point.y);
pData->GetStyle()->SetObjectStyle(CX_OBJECT_LINE);
SetCapture(); // Capture the mouse until button up.
m_ptPrev = point; // Serves as the MoveTo() anchor point
// for the LineTo() the next point,
// as the user drags the mouse.
return;
}
Gather the Mouse Movements
NOTE >> The OnMouseMove() handler already captures stroke data as it is being drawn.
1. Modify the OnMouseMove() handler (in the scribvw.cpp file) to add the data point to the chart as well.
void CScribbleView::OnMouseMove(UINT, CPoint point)
{
// Mouse movement is interesting in the Scribble
// application only if the user is currently drawing a new
// stroke by dragging the captured mouse.
if (GetCapture() != this)
return;
// If this window (view) didn't capture the mouse,
// the user isn't drawing in this window.
CClientDC dc(this);
// CScrollView changes the viewport origin and mapping
// mode.
// It's necessary to convert the point from device
// coordinates to logical coordinates, such as are stored
// in the document.
OnPrepareDC(&dc);
dc.DPtoLP(&point);
m_pStrokeCur->m_pointArray.Add(point);
// Data is added to the chart
SRGraph * pGraph = &GetDocument()->m_Graph;
int nGroups=pGraph->GetGroupCount();
int nArraySize=m_pStrokeCur->m_pointArray.GetSize();
SRGraphData *pData=pGraph->GetGroup(nGroups-2)
->GetIndex(nArraySize-1);
pData->SetValue((double)point.x);
pData->GetStyle()->SetObjectStyle(CX_OBJECT_LINE);
pData=pGraph->GetGroup(nGroups-1)->GetIndex(nArraySize-1);
pData->SetValue((double)point.y);
pData->GetStyle()->SetObjectStyle(CX_OBJECT_LINE);
// Draw a line from the previous detected point in the
// mouse drag to the current point.
CPen* pOldPen = dc.SelectObject(GetDocument()
->GetCurrentPen());
dc.MoveTo(m_ptPrev);
dc.LineTo(point);
dc.SelectObject(pOldPen);
m_ptPrev = point;
return;
}
Take another look at the section that adds the data points to the chart data. Individual data points are added to the linked line chart. The CX_OBJECT_LINE style setting causes a line to be drawn from the previous point in the line to the current data point.
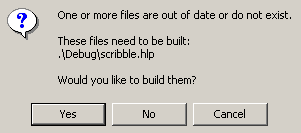
2. Build (F7) and execute (Ctrl+F5) your new version of Scribble.
3. If you see the following message, click Yes to build the file.
4. After drawing a few strokes, drag the splitter window separator bar to the right to expose the chart pane.
Congratulations! In this step of the tutorial, you integrated a chart window with the Scribble window. You can use this technique to integrate chart windows into your other applications as well.
In the third step of the integration sample, you will learn to convert the Scribble document into a ComDoc.