STEP 3 - Add Additional User Interface Support
At this point, we have developed a skeleton 1stEdit application and added syntax highlighting support. In the last part of this tutorial, we create additional user interface support. This section is divided into five smaller procedures, which are covered in each of the following five sections.
Objective Edit has handlers for many common user interface interactions, such as Undo/Redo, Find/Replace, Cut/Copy/Paste, and Bookmark operations. Some of these, such as Cut/Copy/Paste, are added to every AppWizard-generated application. You can easily add the rest.
Create a New Toolbar
New toolbars are a frequently requested feature of user interfaces. To create a new toolbar and add it to 1stEdit, follow these steps:
1. Click on the Resource View tab. Right-click the toolbar folder, and select Insert Toolbar. Name the toolbar IDR_TOOLBAR_EDIT.
2. Add buttons to the toolbar, as shown in
Figure 30. Most of these bitmaps are available in the
DockTool sample that ships with Visual C++.
3. Give the buttons the following IDs:
ID_EDIT_UNDO
ID_EDIT_REDO
ID_EDIT_FIND
ID_EDIT_FINDNEXT
ID_SECEDIT_BOOKMARK_TOGGLE
ID_SECEDIT_BOOKMARK_NEXT
ID_SECEDIT_BOOKMARK_PREV
ID_SECEDIT_BOOKMARK_DELETEALL
You do not need to add a prompt to these IDs.
Incorporate the Toolbar into the Project
The next step is to incorporate the toolbar from the previous step into the project. Incorporating the toolbar requires these steps:
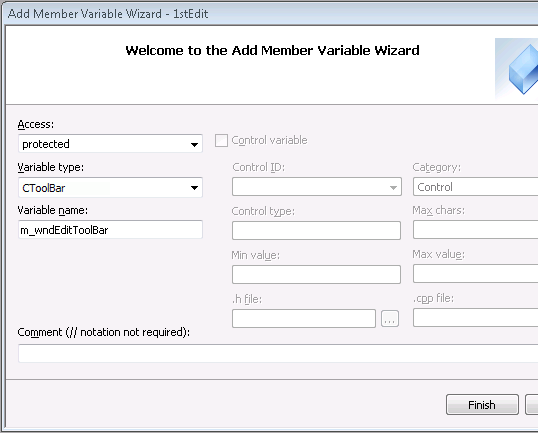
1. Switch to the ClassView tab. Right-click the CMainFrame class, and select Add Member Variable…
2. The
Add Member Variable window appears, as shown in
Figure 31. Add a protected member of type
CToolBar, named
m_wndEditToolBar.
3. Edit the CMainFrame::OnCreate() handler, and then add these lines of code immediately before the last line of code. The last part of the function should look like this:
// Create the new Edit ToolBar
if (!m_wndEditToolBar.Create(this) ||
!m_wndEditToolBar.LoadToolBar(IDR_TOOLBAR_EDIT))
{
TRACE0("Failed to create edit toolbar\n");
return -1; // fail to create
}
m_wndEditToolBar.SetBarStyle(m_wndEditToolBar.GetBarStyle() |
CBRS_TOOLTIPS | CBRS_FLYBY | CBRS_SIZE_DYNAMIC);
m_wndEditToolBar.EnableDocking(CBRS_ALIGN_ANY);
DockControlBar(&m_wndEditToolBar);
return 0;
}
Modify the 1stEdit menus
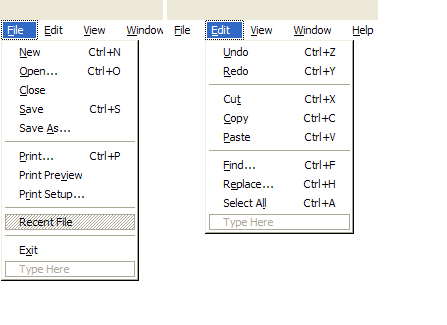
To modify the 1stEdit menus, edit the IDR_MY1STETYPE menu resource by adding the menu items from Table 11 under the appropriate top-level menu:
Table 11 – 1stEdit menu items
Top Menu | New Menu ID | Caption |
Edit | ID_EDIT_REDO | &Redo\tCtrl+Y |
Edit | ID_EDIT_FIND | &Find...\tCtrl+F |
Edit | ID_EDIT_REPLACE | R&eplace...\tCtrl+H |
Edit | ID_EDIT_SELECT_ALL | Select A&ll\tCtrl+A |
The finished menus should look like
Figure 32:
Add the Dynamic Splitter Window
You can now add a dynamic splitter window. Open the Component Gallery, and insert the Split Bars component. Make sure that you have Both selected for your bars, and that the CChildFrame class is selected as the class for which to add the splitters.
The Component Gallery adds a member variable of type CSplitterWnd to your CChildFrame class and adds an override for the OnCreateClient() function, using the following code:
CSplitterWnd m_wndSplitter;
virtual BOOL OnCreateClient(LPCREATESTRUCT lpcs,
CCreateContext* pContext);
The implementation for OnCreateClient() is given here:
BOOL CChildFrame::OnCreateClient(LPCREATESTRUCT lpcs,
CCreateContext* pContext)
{
// CG: The following block was added by the Split Bars
//component.
{
if (!m_wndSplitter.Create(this,
2, 2,
CSize(10, 10),
pContext))
{
TRACE0("Failed to create split bar ");
return FALSE; // failed to create
}
return TRUE;
}
}
This is all that is necessary to add dynamic splitter windows to your Objective Edit project.
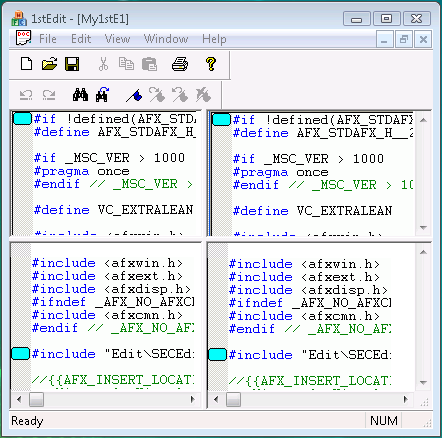
Build and Run Step 3
You may now build and run
1stEdit Step 3, as shown in
Figure 33. All the toolbar buttons and new menu items are automatically connected to the appropriate commands in Objective Edit.
Once you have integrated Objective Edit into your application, you can add application-specific behavior by calling Objective Edit methods. You can customize the behavior of Objective Edit by creating a derivative and overriding virtual functions.