Using the Advanced Docking Windows Architecture
The ADW feature is a component of Objective Toolkit. It is not included with the MFC Docking Window extensions in Objective Toolkit. To enable your library with ADW support, run the Objective Toolkit Build Configuration Wizard and select the Advanced Docking Window. If you want to use the customizable toolbars and menubars in Objective Toolkit, you must enable them explicitly through the Build Wizard.
NOTE >> At a lower level, the advanced docking architecture can be used to support any container window seamlessly. The API support is only available for docking inside frame windows.
To incorporate advanced docking windows into your application
You can use the advanced docking windows architecture to provide any frame window (CFrameWnd, CMDIFrameWnd, CMDIChildWnd, SECFrameWnd, SECMDIFrameWnd, SECWorkbookWnd, and more) with docking support.
1. In your frame header, instantiate a docking feature (SECFrameDockingFeature) and a docking factory (SECLayoutDockFactory) object. The docking feature is the hook to enable the docking architecture for that window and the docking factory is a convenience object designed to simplify the process of creating dockable node participants. For example,
protected:
// AdvDocking Additions
SECLayoutDockFactory m_LFactory;
SECFrameDockingFeature m_dockFeat;
2. In your frame window’s OnCreate() handler, call EnableDocking() on the docking feature. Note that this is a member of SECFrameDockingFeatureBase. Do not confuse it with MFC’s CFrameWnd::EnableDocking() member. The prototype for SECFrameDockingFeatureBase::EnableDocking() is as follows:
virtual BOOL EnableDocking(CWnd* pParent,DWORD
dwDockStyle=SEC_DOCK_ANY,
BOOL bCreateNewLocalDockMgr=FALSE,
SECLNDockingMgr* pMgr=NULL);
The first parameter is a pointer to the frame window to participate in the docking architecture.
You can apply a combination of zero or more of the following flags to the second parameter:
Table 52 – DockStyle Flags
Docking style | Behavior |
SEC_DOCK_LEFT | Allows docking to left border. |
SEC_DOCK_RIGHT | Allows docking to right border. |
SEC_DOCK_BOTTOM | Allows docking to bottom border. |
SEC_DOCK_TOP | Allows docking to top border. |
SEC_DOCK_ANY | Allows docking to any border. |
The third parameter specifies whether to create a local docking manager or not. If a local docking manager is created, then nodes docked to this docking feature will not be able to dock to any other docking features. This is typically used inside MDI children, to prevent docking with other frame windows.
The fourth parameter is a pointer to the docking manager to associate with this feature. You can use the same manager for multiple dock features (1 feature per frame) to configure docking between specific windows. If this parameter is defined, bCreateNewLocalDockMgr is ignored.
An example:
int CMainFrame::OnCreate(LPCREATESTRUCT lpCreateStruct) {
. . .
m_dockFeat.EnableDocking(this);
}
3. Using the dock factory, create a dockable node for each entity (CWnd or DC image) you want to incorporate into the docking framework. For example,
// Get the CWnd you want to wrap in a dockable node
CWnd* pMyWnd=GetMyWndFromSomewhere();
// Create the dockable node. The first parameter is the CWnd,
// the second is the parent window, the third is the default
// title string (displayed when floating) and the fourth
// signals that we want this node to automatically scale when
// sized. Note that the factory performs all memory
// management,
// do not deallocate directly.
SECLayoutNode*
pDockNode=m_LFactory.CreateDockableNodeWnd(pMyWnd,
this,_T(“Dockable Node 1”),TRUE);
// Or, you could create a dockable node window from a
// child control id:
SECLayoutNode*
pDockNode=m_LFactory.CreateDockableNodeWnd(IDC_CHILDID,
this,_T(“Dockable Node 2”));
4. Now, use DockNode() or FloatNode() or both members of SECFrameDockingFeature to place your dockable nodes created in the previous step initially. Several overloaded varieties of these functions are available for use so consult the online help for a thorough description of each parameter. For example:
// Dock a node to the bottom, initially sized 100 pixels wide
m_dockFeat.DockNode(pDockNode,SEC_DOCK_BOTTOM,100);
// Dock a node to the bottom, using average row size
m_dockFeat.DockNode(pDockNode2,SEC_DOCK_BOTTOM);
// Dock a node to the right, creating a new column of width
//of 50 pixels
m_dockFeat.DockNode(pDockNode3,SEC_DOCK_RIGHT,50,TRUE);
// Float a node at screen coordinates
// left=100,top=150,right=300,bottom=400
m_dockFeat.FloatNode(pDockNode4,CRect(100,150,300,400));
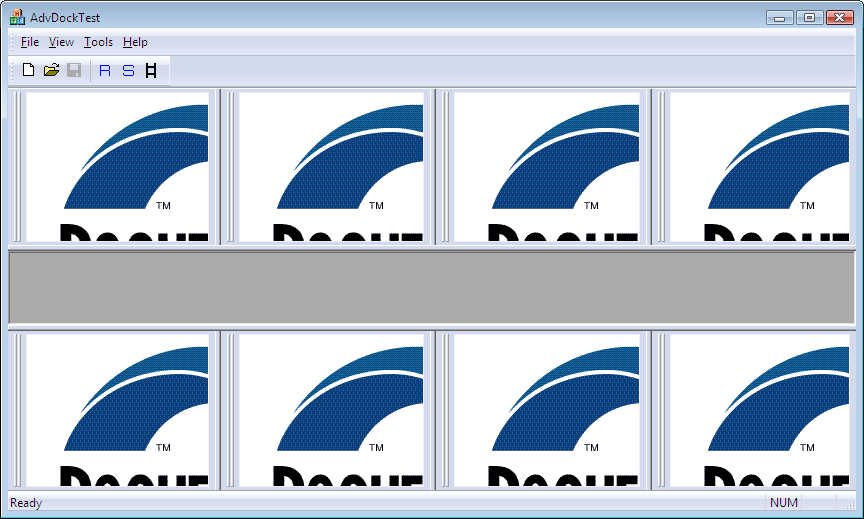
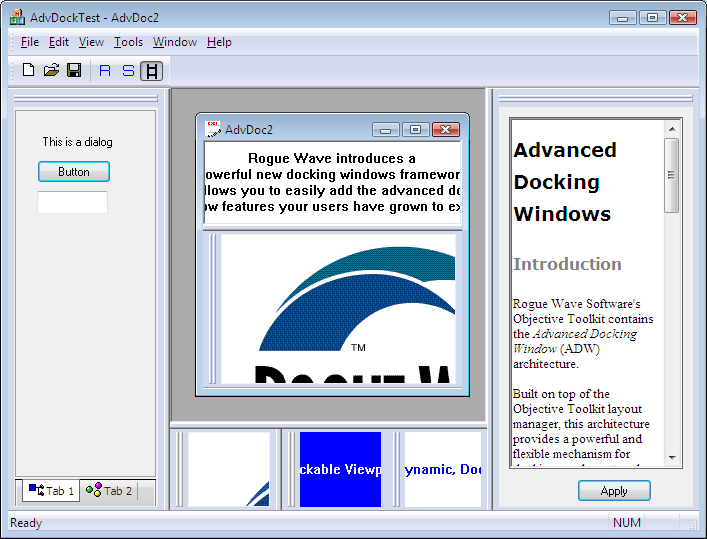
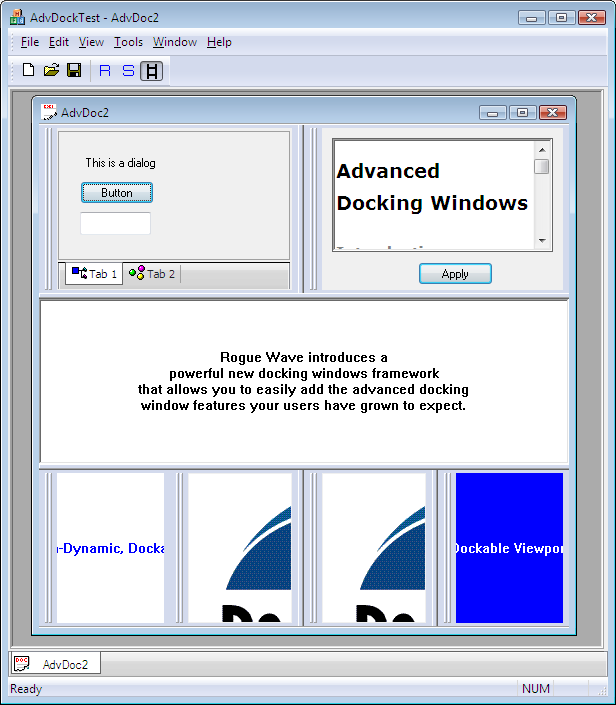
5. The result of the preceding code would be a layout similar to the following figure:
Note you can apply the
DockNode() and
FloatNode() methods iteratively to reset the position of a particular dockable node throughout the lifetime of that particular node. In addition, you can use
SECFrameDockingFeatureBase::ShowNode() to show or hide a docked node. For examples of configurations,
“Advanced Docking Configurations.”To create dockable device context nodes
The Advanced Docking architecture enables you to create lightweight, windowless (no HWND) dockable nodes based on Device Context drawing. This node type is ideal for rendered images, pictures, and MVC ViewPorts. To create a dockable DC node, do the following:
1. Derive a class from SECReparentableNodeDC and then override the following protected virtual method:
class CMyDCNode : public SECReparentableNodeDC
{
protected:
virtual void OnDrawNode(HDC hDC,const CRect& rectDraw);
};
2. In your override, render your image to the DC passed in, given the bounding rect passed in. For example:
void CMyDCNode::OnDrawNode(HDC hDC,const CRect& rectDraw)
{
CDC* pDC=CDC::FromHandle(hDC);
ASSERT_VALID(pDC);
pDC->FillSolidRect(rectDraw,m_clr);
CRect rc=rectDraw;
pDC->SetTextColor(COLORREF(RGB(0,255,0)));
pDC->DrawText(m_strDraw,rc,DT_SINGLELINE|DT_CENTER|DT_VCENTER);
}
// The DC node will be wrapped in a dockable node wrapper.
// If we need to manipulate the DC node, it can be done
// through a back pointer returned via the NODEBP macro
// below.
CMyDCNode* pDCNode;
SECLayoutNode* pDockNode;
// Create the dockable DC node, and its docking wrapper
// (pDockNode).
// The docking wrapper should be used for the DockNode
// operation, not the pDCNode back pointer. The NODEDC_CLASS
// macro is used to provide the run-time class name for
// factory allocation.
// Note that the factory performs all memory management,
// do not deallocate directly.
pDockNode = m_LFactory.CreateDockableNodeDC(this,
NODEDC_CLASS(CMyDCNode),
_T(“Node 1”),
NODEBP(pDockNode));
ASSERT(pDockNode && pDCNode);
// pDockNode back-pointer provided for object manipulation,
// if needed. If not needed, you could have called
// CreateDockableNodeDC like this:
pDockNode = m_LFactory.CreateDockableNodeDC(this,
NODEDC_CLASS(CMyDCNode));
// Call a CMyDCNode function (i.e. App-Specific)
pDockNode ->SetDrawColors(COLORREF(RGB(0,0,255)));
m_dockFeat.DockNode(pDockNode); // no second parm, use
// defaults
To use docking insertion constraints
The following code demonstrates one way you can use the SECDockInsertionConstraints object to create an advanced docking configuration.
CMainFrame::OnCreate(…)
{
// (EnableDocking call, then node creation)
// Create our reusable insertion constraint object
SECDockInsertionConstraints cnstr;
// Dock the first node to the bottom dock site, using default
// sizing
cnstr.SetDockSite(SEC_DOCK_BOTTOM);
m_dockFeat.DockNode(pDockNode,cnstr);
// Dock a second node immediately after pDockNode (to the right,
// since the bottom is horizontal), but set the second
// node to occupy exactly 100 pixels in width. pDockNode will
// subsequently be adjusted to fit the remaining width
cnstr.m_nForcedSize=100;
m_dockFeat.DockNode(pDockNode2,cnstr);
// Dock a third node immediately below nodes 1 and 2, occupying a
// new line with a height of 75 pixels
cnstr.m_bCreateNewLine=TRUE;
cnstr.m_nForcedNewLineSize=75;
m_dockFeat.DockNode(pDockNode3,cnstr);
// Now dock a node to the top border instead
cnstr.Reset(); // reset constraints set above back to defaults
cnstr.SetDockSite(SEC_DOCK_TOP);
m_dockFeat.DockNode(pDockNode4,cnstr);
// Let’s set node 5 to not be dynamic, i.e. not provide a sizing
// splitter to change its width within the top docksite.
// Dock next to node 4 (to the right)
cnstr.m_bDynamicNode=FALSE;
m_dockFeat.DockNode(pDockNode5,cnstr);
// Dock node 6 to the left (before) node 4, i.e. the head of the
// row. Node 6 is a dynamic node, so reset constraint from the last
// step
cnstr.Reset();
cnstr.m_pNodeRelative=pDockNode4;
cnstr.m_bInsertAfter=FALSE;
m_dockFeat.DockNode(pDockNode6,cnstr);
...
The preceding constraints would create a layout similar to the following figure:
To adjust the border sizing
Use the SECFrameDockingFeature::SetBorderSizing() method to control sizing properties specific to each border docksite (top, bottom, left, and right) individually or as a group. This method provides the following support:
Table 53 – SECSetBorderSizingParms Members
SECSetBorderSizingParms members | Description |
m_bSplitter | If TRUE, the docksite will provide a sizing border to increase or decrease the border size. If FALSE, size will be fixed. |
m_bSizeOnDock | If TRUE, border will increase or decrease size to accommodate new line insertion or old line removal. If FALSE, border will remain fixed in size. |
m_bRealtimeDrag | If TRUE, border splitter will track instantly. If FALSE, splitter prediction tracker will be used. |
For example:
// Right border: no splitter, no size on dock,
// splitter tracks instantly:
SECSetBorderSizingParms SizingParms(FALSE,FALSE,TRUE);
VERIFY(m_dockFeat.SetBorderSizing(SEC_DOCK_RIGHT,SizingParms));
// Or, the following can be used to apply settings to all borders:
// VERIFY(m_dockFeat.SetBorderSizing(SizingParms));
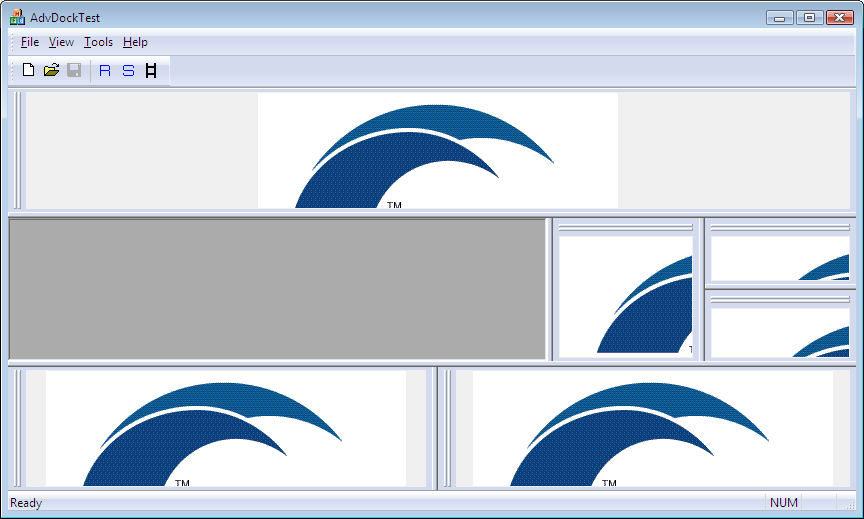
In the following figure, the right border does not provide a sizing splitter. If nodes 5 or 6 or both were not dynamic (see SECDockInsertionConstraints::m_bDynamicNode in the Objective Toolkit Class Reference), there would not be a splitter between nodes 5 and 6.
To use ‘real-time’ drag mode
You can use this feature to enable or disable. Use the following static function:
static SECDragDropDockingFeature::SetRealtimeDrag(BOOL bEnable);
To use floating multidock mode
By default, this support is enabled, you can disable via the following static function:
static SECFloatDynGridLineTarget::EnableMultiDock(BOOL bEnable);
To use alternate border layout logic
By default, the frame docking feature is configured so that the top and bottom borders receives precedence over the left and right borders, (for example, the top/bottom always occupies the entire available client width and the left/right borders shrink to accommodate the height between the top/bottom borders). This mode is configurable so that the left/right borders can receive priority over the top/bottom.
The following function is provided to modify the border layout logic:
SECFrameDockingFeatureBase::SetBorderLayout(
SECLNBorderClient::BorderAlgorithm BorderAlg,
BOOL bRecalc=TRUE);
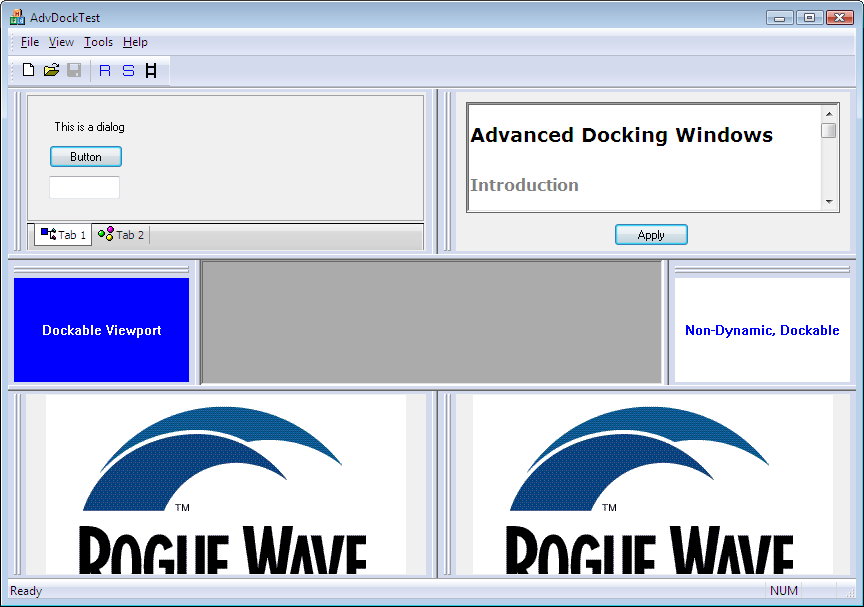
By default, the top and bottom dock sites receive precedence over the left and right dock sites. This behavior is the same as MFC’s CDockbar layout algorithm's behavior. The following figure illustrates this layout:
The following code can be used to toggle the border mode so that left/right receives priority over top/bottom.
m_dockFeat.SetBorderLayout(SEC_DOCKBORDERS_LRTB);
This appears as follows. Notice how the left/right borders now occupy the entire height, whereas the bottom is shrunk to fit between. Note also the dockable toolbar and menubar are participants in MFC’s controlbar architecture so they are not subject to this layout manipulation.
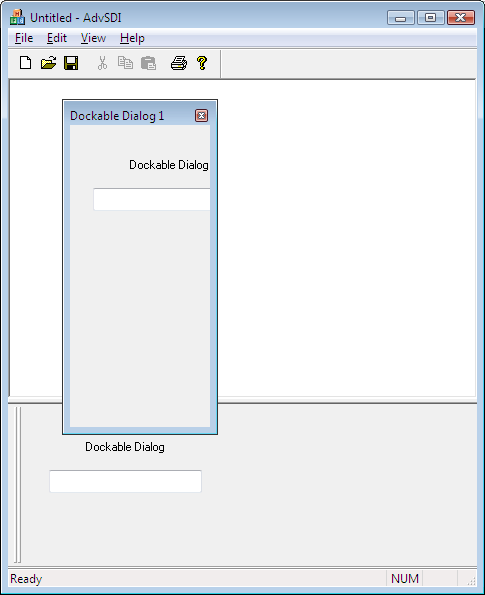
To integrate a dockable node inside an MDI child frame
NOTE >> The lifetime of dockable nodes associated with a MDI child frame can be shorter than that of your mainframe. By default, enabling a MDI childframe for docking using the procedure outlined above allows any dockable node on the mainframe to be docked to that MDI child, and vice versa. In addition, the MDI child nodes can be docked to other MDI child nodes. As a result, when the MDI child is closed, all contained nodes, regardless of their original parent, are destroyed as well. Avoid accessing node pointers that were destroyed with the destruction of a MDI childframe.
2. If you want to limit the docking of a MDI child exclusively to that child, you must call EnableDocking() with the third parameter set to TRUE. For example:
m_dockFeat.EnableDocking(this,SEC_DOCK_ANY,TRUE);
The third parameter signals to the docking feature that all nodes initialized for that frame can only dock to that frame and no other. In addition, dockable nodes created for other frames do not participate with that MDI child in the docking operation (for example, you cannot dock a node from the mainframe to that child frame, or vice versa). This is similar to how MFC’s controlbar architecture works.
For more information on defining a docking participant subset, please refer to Objective Toolkit Class Reference for SECFrameDockingFeature::EnableDocking().
The following figure illustrates an MDI childframe with docking windows. The same core docking logic is leveraged in both the mainframe and childframe.