Create Symbols Using Symbol Designer
Next, let’s create some custom symbols with the Symbol Designer and then save them as disk files. In this section, you learn how to:
• Use the component drawing commands in the Symbol Designer.
• Set properties for a component.
• Import a bitmap image into an Objective Views canvas.
• Save a symbol to a disk file.
The Symbol Designer is built with the Objective Views library. Most of the functionality in the Symbol Designer is part of the Objective Views library and is available to your applications.
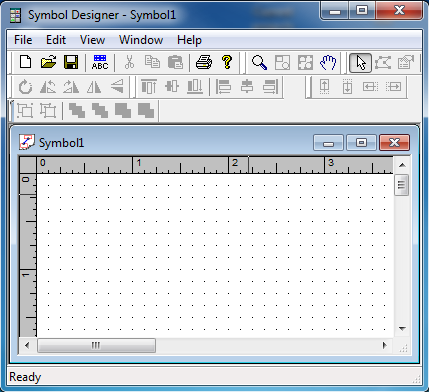
1. Run the Symbol Designer from the Windows Start menu.
2. Symbol Designer appears on the screen.
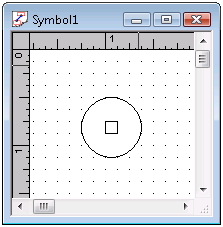
Now let’s create a symbol that consists of a circle that contains a smaller square.
3. Select the
Ellipse tool button

from the drawing toolbar. The cursor changes to a cross to indicate that the canvas is ready to draw an ellipse.
4. Hold the left mouse button down and drag the mouse. An outline of an ellipse is drawn on the canvas. Release the left mouse button when you are finished drawing the ellipse.
5. Select the
Rectangle tool button

from the drawing toolbar. Draw a square inside of the ellipse using the same technique you used to draw the ellipse. Your symbol should appear as in
Figure 16:
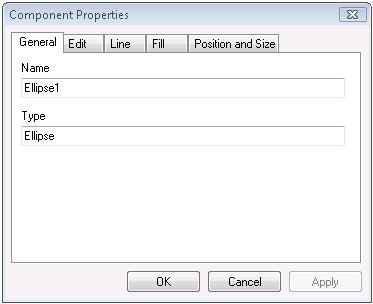
6. Click the right mouse button over the circle and select Properties from the context menu. The property sheet appears.
7. The Fill and Line property pages allow you to alter the appearance of your symbol. Pick any foreground color from the Fill page.
When you the change the properties of a component in a symbol, only the individual component is changed. The components are children of the symbol. For example, if you changed the edit properties of the circle, the symbol it is part of would not be impacted in any way.
8. Next, assign a type identifier to the symbol. The type identifier is a string that you can use to categorize your symbols. Select the Set Symbol Type entry from the Edit menu. Enter a type name, such as My Circle. Then, click OK.
9. Now, save the symbol to a file. Select Save As from the File menu and save it as circle.sym in the RES directory of your project directory.
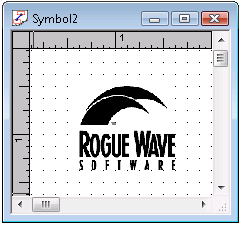
Now let’s create another symbol that contains a bitmap.
10. Select New from the File menu to create a new symbol.
11. Click the
Image toolbar button

on the drawing toolbar. Using the File Open dialog box, select the file
STINGRAY.BMP from the
<stingray-installdir>\Samples\Views\Showcase\Res directory in the Objective Views installation directory. Then, close the dialog box by clicking the
Open button.
12. The cursor changes to indicate that the canvas is ready for you to insert an image. Click the left mouse button on the canvas to insert the bitmap. The bitmap should appear as in
Figure 18.
Notice that the bitmap has a white background and that you cannot see the grid dots behind it. We can set the properties of the bitmap so that it is transparent.
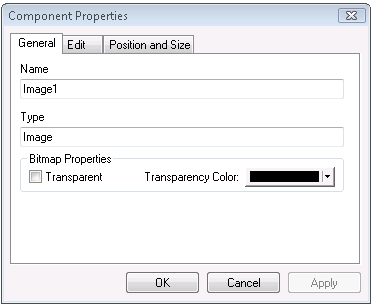
13. Place the pointer over the bitmap and click the right mouse button. Choose Properties from the context menu. Symbol Designer displays a property sheet for the bitmap.
14. Click the Transparent check box and select the color white from the transparency color button. Then click OK. The background for the bitmap becomes transparent.
15. Now let’s assign a type to this symbol. In this instance, name it Stingray. As before, save it to the RES subdirectory under Foobar.
16. The next step is to add the symbols to our new application. Close the Symbol Designer and return to Visual Studio.