STEP 1 - Generate a Skeleton Application
In the following sections, we describe in detail how to generate a skeleton application by breaking the procedure into a number of smaller steps. Each step forms a subhead in this section, so that you can quickly navigate the procedure by reading the subheads.
Create a New Project
The first step in generating a skeleton application is to create a new Visual C++ project. To create a new project, follow this procedure:
1. Start Visual Studio.
2. Select File | New.
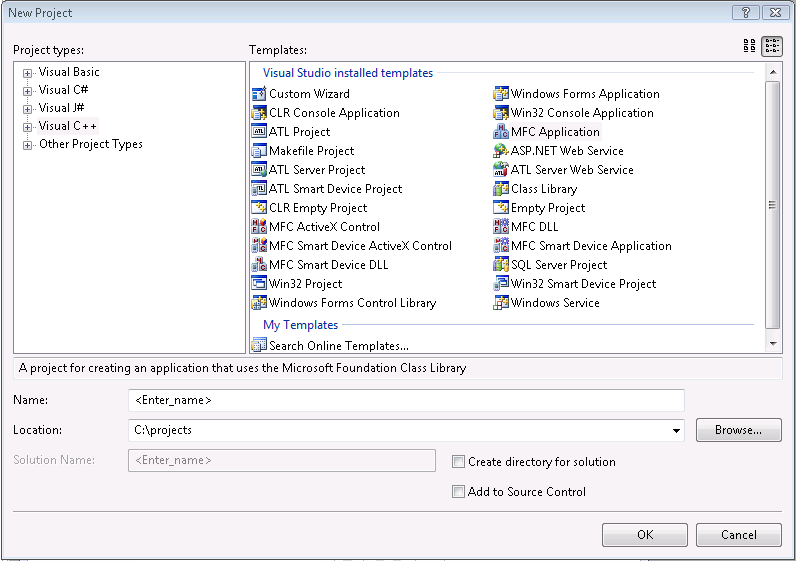
3. In the
New Project dialog box, select
Visual C++ Projects, as shown in
Figure 23.
4. Enter 1stEdit for the project name.
5. Select MFC Application.
6. Click OK. The AppWizard launches.
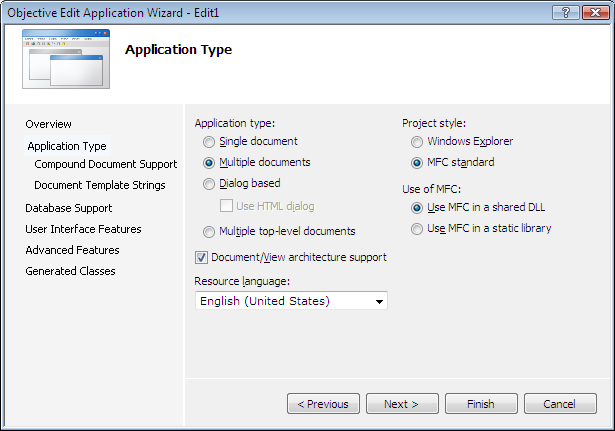
Choose AppWizard Options
Follow this procedure:
1. Accept the defaults.
2. Click Finish.
This will generate the new project and the necessary files for you.
Modify stdafx.h
Now that you have created a new project, the next step in generating a skeleton application is to modify the stdafx.h file. Here are the steps in this procedure:
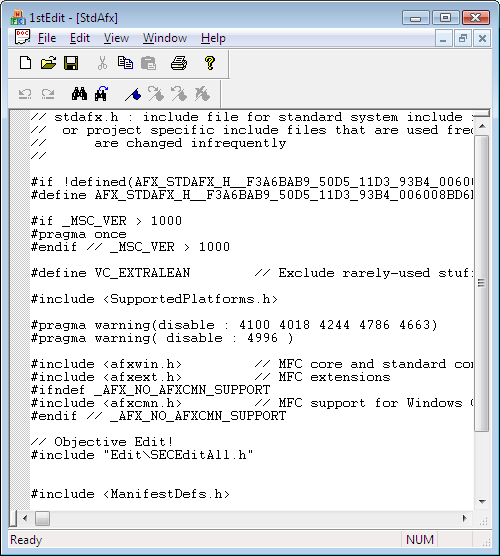
1. Open stdafx.h.
2. Add the following lines at the end of the file:
#include "Edit\SECEditAll.h"
#include <SupportedPlatforms.h>
The first of these is the core Objective Edit header file. Once this file is added, all required classes are available to you inside your application.
Include Objective Edit Resources
You can now move on to the step of including Objective Edit resources in your skeleton application. To do so, follow this procedure:
1. In Visual Studio, open the Resource View by clicking View|Resource View.
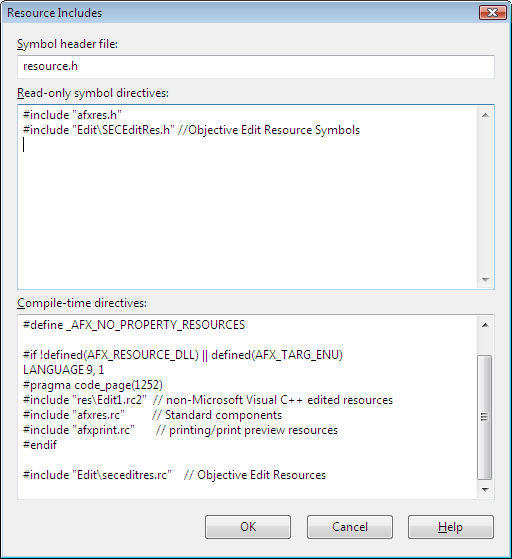
2. Right-click on the .rc file, and select Resource Includes.
3. Add the following line to Read-only symbol directives:
#include "Edit\seceditres.h"
This makes the resource symbols available to your application.
4. Add the following line to Compile-time directives:
#include "Edit\seceditres.rc"
Note that this line is added outside of any
#ifdefs that are present. The text boxes will appear as in
Figure 26.
5. Click OK.
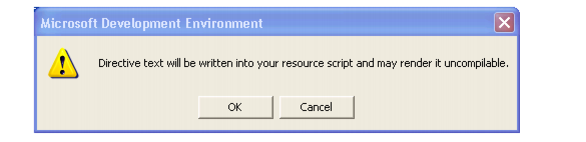
6. A message box, shown in
Figure 27, warns that what you have just entered will be written verbatim into the resource script.
7. Click OK.
Modify the View's Header File
The next step in generating your skeleton application is to modify the view’s header file. Here is the procedure:
1. In Visual Studio, open 1stEditView.h.
2. Change the derivation of the view by replacing all occurrences of CView with SECEditView.
3. Delete these three function declarations:
virtual BOOL OnPreparePrinting(CPrintInfo* pInfo);
virtual void OnBeginPrinting(CDC* pDC, CPrintInfo* pInfo);
virtual void OnEndPrinting(CDC* pDC, CPrintInfo* pInfo);
If you decide not to delete these, be sure to modify the implementation to call the SECEditView base class versions of these functions.
Modify the View's Implementation File
After you modify the view’s header file, you must also modify the view’s implementation file. Here is the procedure:
1. In Visual Studio, open 1stEditView.cpp.
2. Replace all occurrences of CView with SECEditView.
3. Delete the implementation for these three functions because their functionality is already provided by the SECEditView class:
virtual BOOL OnPreparePrinting(CPrintInfo* pInfo);
virtual void OnBeginPrinting(CDC* pDC, CPrintInfo* pInfo);
virtual void OnEndPrinting(CDC* pDC, CPrintInfo* pInfo);
4. You must also delete the message map entries for the previous functions:
// Standard printing commands
ON_COMMAND(ID_FILE_PRINT, CView::OnFilePrint)
ON_COMMAND(ID_FILE_PRINT_DIRECT, CView::OnFilePrint)
ON_COMMAND(ID_FILE_PRINT_PREVIEW, CView::OnFilePrintPreview)
If you decide to leave these in, call the base class versions after you do your processing. If you leave these functions in, but do not call the base class, Objective Edit will crash when you try to do Printing or Print Preview.
Add an SECEdit Object to the C1stEditDoc Class
The next step in generating our skeleton application is to add an SECEdit object to the C1stEditDoc class. Open the file 1stEditDoc.h, and add a public member variable of type SECEdit as follows:
SECEdit m_Edit;
Override SECEditView::GetEdit()
You must now override the virtual function SECEditView::GetEdit() in your CMy1stEditView class. Here is the procedure:
1. Right-click the mouse on the CMy1stEditView class.
2. Select Add Member Function.
3. In the Function Type box, add:
SECEdit*
4. In the function declaration, add:
GetEdit()
5. Make the function protected and virtual.
6. As the body of this function, add:
return &GetDocument()->m_Edit;
Override the Methods for Document Loading and Saving
There should already be an override of the method:
CDocument::OnNewDocument()
You must now add a call to m_Edit.Init() to the implementation, immediately before it returns TRUE. Here is how to do it:
BOOL CMy1stEditDoc::OnNewDocument()
{
if (!CDocument::OnNewDocument())
return FALSE;
m_Edit.Init();
return TRUE;
}
You can use ClassWizard to add overrides for SaveModified(), OnOpenDocument(), and OnSaveDocument() to your CMy1stEditDoc class. The SaveModified() code will be written by the ClassWizard. Make the implementation for the OnOpenDocument() and OnSaveDocument() overrides as follows:
BOOL CMy1stEditDoc::OnOpenDocument(LPCTSTR lpszPathName)
{
if (!CDocument::OnOpenDocument(lpszPathName))
return FALSE;
return (m_Edit.ReadFile(lpszPathName));
}
BOOL CMy1stEditDoc::OnSaveDocument(LPCTSTR lpszPathName)
{
return (m_Edit.SaveFile(lpszPathName));
}
You will need to override IsModified() by yourself because you cannot do this through the ClassWizard.
BOOL CMy1stEditDoc::IsModified()
{
return (m_Edit.GetModified());
}
Build and Run Step 1
You have reached the end of
Step 1. You can now compile and run the application.
Figure 28 shows the application in action.
Now let’s discuss syntax highlighting.